A frame that sits 5 mm out of level can make an otherwise sharp retail graphic look poorly finished. That is why knowing how to install aluminium frames correctly matters before the printed panel, fabric graphic, acrylic face, or LED component goes into place. For commercial displays, installation is not only about fixing aluminum sections to a wall. It is about getting the frame square, secure, accessible, and ready to present the graphic as intended.
Aluminium frames are used for wall signage, poster systems, tension fabric displays, LED light frames, exhibition backdrops, counter fronts, and point-of-sale graphics. The method changes with the frame profile and surface, but the basic sequence remains the same: inspect the parts, measure the position, fix the frame accurately, fit the graphic, and complete a final quality check.
Identify the Aluminium Frame System First
Do not begin drilling until you know exactly what type of frame you are installing. A slim snap frame with a printed poster uses a different fitting method from a deep LED light frame or a modular exhibition frame. The profile depth, graphic material, fixing points, and weight all affect the installation.
For a standard wall-mounted aluminum frame, check whether it is supplied as a fully assembled unit or as separate profile lengths with corner brackets. A preassembled frame is faster to position, while a knock-down frame is easier to transport and can be more practical for larger display sizes.
Also confirm how the print will be fitted. Common options include a poster held behind a snap profile, a rigid PVC or acrylic panel, a tension fabric graphic with silicone edge beading, or a backlit fabric face for an LED system. Fitting the wrong substrate into the frame can cause wrinkles, light hotspots, bowed edges, or a loose finish.
Prepare the Wall, Tools, and Fixings
The wall determines the fixing method. Concrete, brick, drywall, timber, glass partitions, and temporary exhibition walls do not hold screws in the same way. A large-format aluminum frame with a printed panel may look light, but its combined weight can increase significantly once lighting, acrylic, or a double-sided graphic is added.
Use a tape measure, spirit level or laser level, pencil, drill, suitable drill bits, screws, wall plugs or anchors, screwdriver, and safety glasses. For long frames, a second installer is recommended. It is easier to hold a frame level with two people than to correct several misaligned holes afterward.
For masonry walls, use wall plugs matched to the screw size and wall condition. For drywall, use rated anchors or fix into studs where possible. For timber, suitable wood screws are usually sufficient. If the wall surface is uneven, use spacers or packers behind the frame so the aluminum profile does not twist when tightened.
Before drilling, check for electrical wiring, plumbing, and concealed services. This is especially relevant in retail units, offices, malls, and event venues where wall plans may not be visible on site.
Mark the Position Before You Install Aluminium Frames
Start by marking the finished display position, not only the top edge of the frame. Consider sightline, surrounding signage, counter height, electrical access for LED frames, and the size of the printed graphic. A frame mounted too high can reduce reading distance and product visibility, while one mounted too low may be blocked by furniture or passing traffic.
Measure the frame width and height twice. Mark the top line with a level, then mark the fixing points based on the frame’s mounting holes or hanging brackets. If the frame will sit alongside other graphics, measure from a shared reference point such as a wall edge, ceiling line, or shelf rather than estimating by eye.
For a multi-panel wall or a set of matching frames, mark all positions before fitting the first unit. This helps maintain consistent spacing. In retail graphics, uneven gaps between panels are more noticeable than many buyers expect.
Allow for Opening Space and Graphic Changes
Snap frames need clearance around the outer edges so the profile can open. Fabric frame systems may require access around the full perimeter to insert or remove the silicone-edged graphic. LED light frames need cable clearance and, in some cases, access to a power supply or driver.
This is where installation often depends on the application. A permanent office sign can sit close to a corner if it will rarely change. A promotion frame that receives new campaign graphics every month should be placed where staff can open it and replace the print without removing the entire unit.
Assemble and Fix the Frame
If the aluminum frame arrives in sections, assemble it on a clean, flat surface. Connect the corners according to the supplied bracket or screw system. Check that the frame is square by measuring diagonally from corner to corner. Matching diagonal measurements indicate a square frame. If one diagonal is longer, adjust the corners before wall mounting.
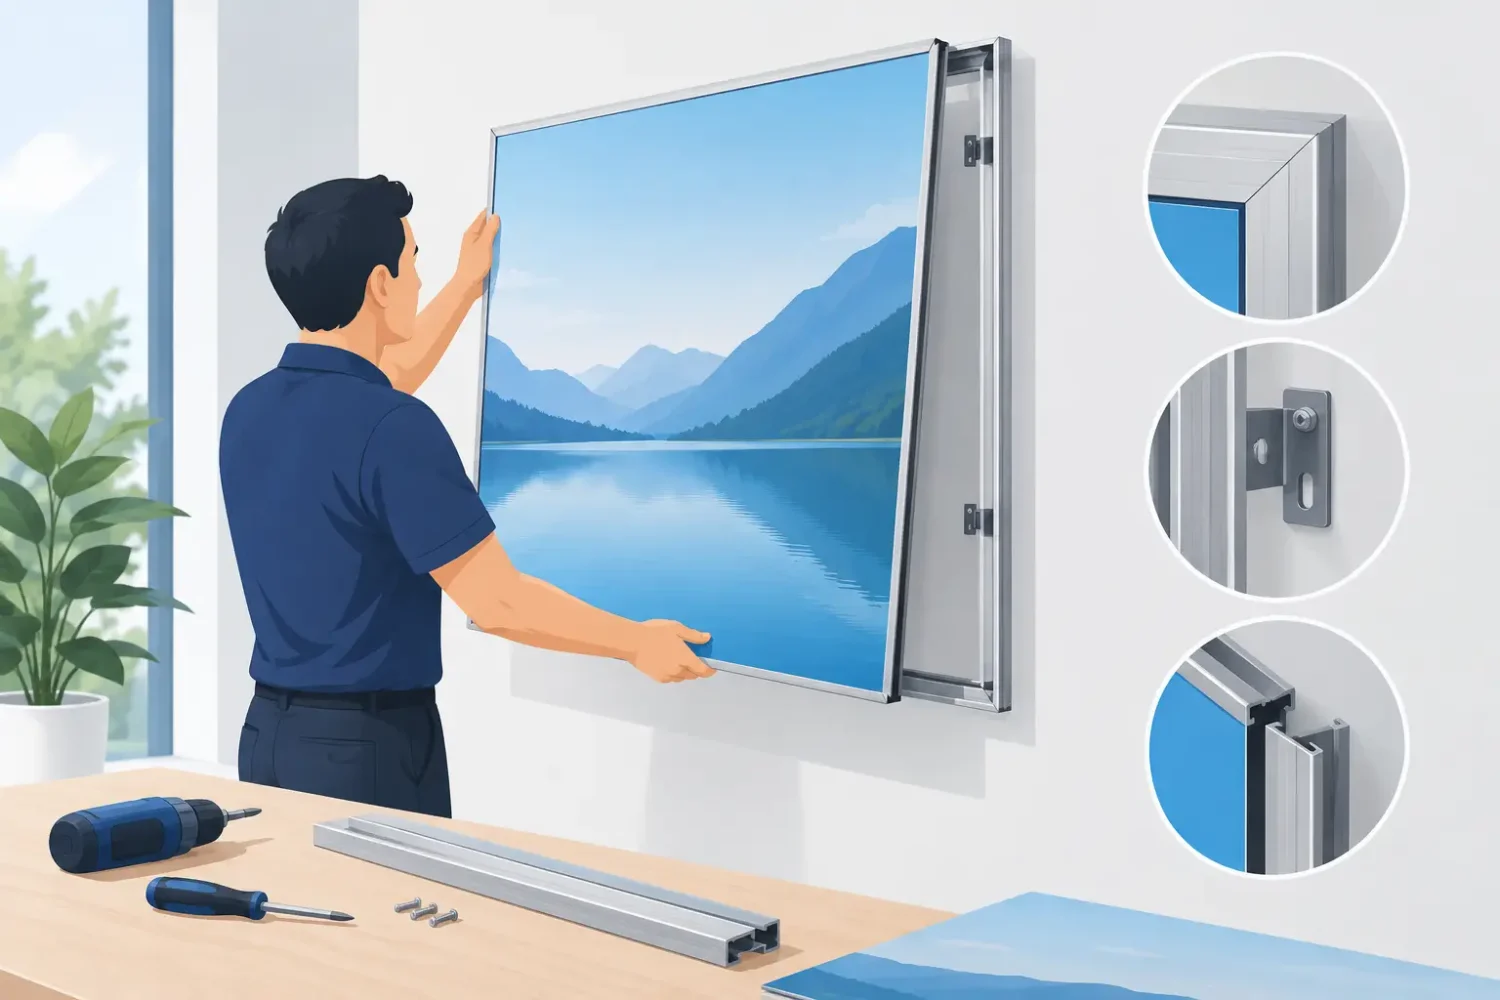
For larger frames, install the top fixing points first. Hold the frame against the marked line, drill or secure the top screws, and check level again before tightening. Then install the side and bottom fixings. Do not overtighten screws, particularly on lightweight profiles. Excessive pressure can distort the aluminum and prevent snap edges or graphic channels from operating correctly.
Some systems use concealed rear brackets instead of visible screw holes. In that case, fix the brackets to the wall first, using the level marks, then hang the frame onto them. Test that it locks securely and does not lift or shift when pulled gently from the lower edge.
For freestanding display frames, the principle is similar but the focus changes to base stability. Assemble the vertical profiles on a clean floor, attach the feet or base plates, and confirm that the structure is stable before fitting the printed graphic. For exhibition use, use the specified hardware only. Improvised screws or substitute connectors can compromise alignment and safety.
Install the Printed Graphic Carefully
The frame may be straight, but poor graphic fitting can still spoil the display. Handle printed panels with clean hands or gloves, especially for gloss, transparent, hologram, matt silver, or backlit materials where fingerprints and surface marks show easily.
For snap frames, open all sides, remove the protective sheet if included, place the poster squarely, and close the profiles one side at a time. Start at the top, then secure the sides, followed by the bottom. Ensure the print sits flat and is not trapped in the hinge area.
For tension fabric aluminum frames, begin inserting the silicone edge at the four corners. Then work toward the center of each side. This distributes tension evenly and reduces the chance of a wrinkled fabric face. Do not force the beading into the channel with sharp tools that could cut the fabric or damage the print.
For LED light frames, test the lighting before installing the graphic. Check for even illumination, correct cable routing, and a stable power connection. Once the backlit fabric is fitted, inspect the face from several steps away. Dark zones, folds, and visible internal shadows are easier to correct before the frame is handed over or the store opens.
Complete a Site Check Before Use
Once installed, inspect the frame from the front, side, and normal viewing distance. Check that it is level, corners are tight, wall fixings are secure, and the graphic is clean and evenly tensioned. Open and close one edge of a changeable system to confirm that future graphic replacement will be straightforward.
For campaign displays, keep the frame specification with the print order details. Record the visible graphic size, overall frame size, profile depth, print material, and finishing method. This avoids ordering a replacement poster or fabric graphic to the wrong size. It is particularly useful when the same display format is used across retail branches, events, or roadshows.
A correctly installed aluminium frame protects the print, keeps the presentation professional, and makes future campaign changes faster. Measure against the actual hardware, use fixings suited to the wall, and fit the graphic only after the frame is square. That approach gives your branded display the clean finish it was produced to deliver.
Related Posts